A quick guide to adding new blog posts to your Divi website
Many of our websites have blog pages which allow you to add new content to your site. This content is added in the form of posts. If your website was created by us, using the Divi Builder, this guide will show you how to set up new posts.
1: Logging in to your website
Login to your WordPress dashboard. You should have been provided with a WordPress username and password to your website. If you have forgotten your password, you can request for it to be reset, or Get in Touch with us for help.
2: Creating a new post
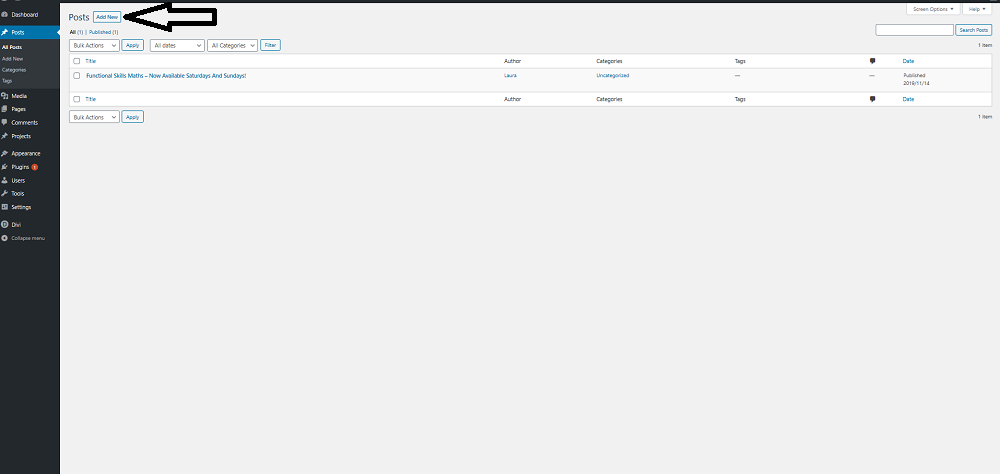
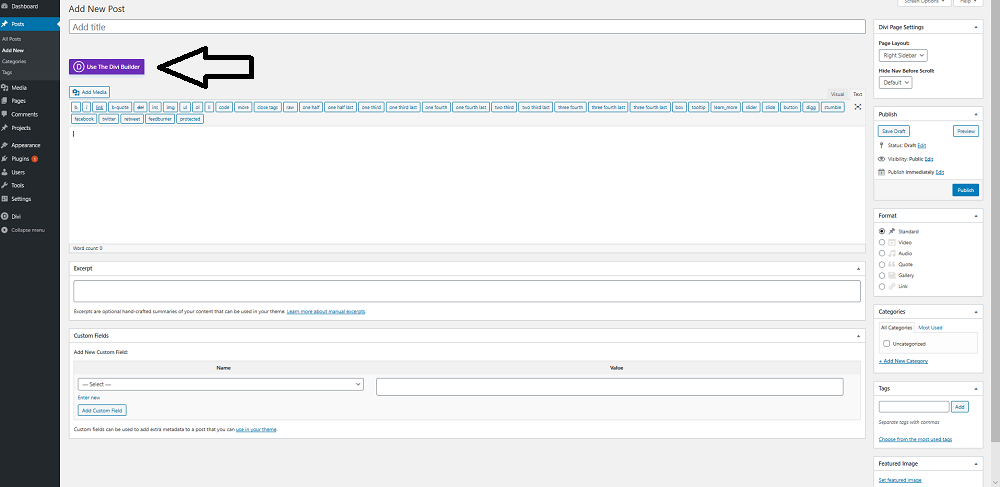
In the sidebar menu click on ‘Posts’ and then click on the ‘Add New’ button to create your new post.
3: Setting up your post
In order for your post to be ready for editing you need to change a few settings.
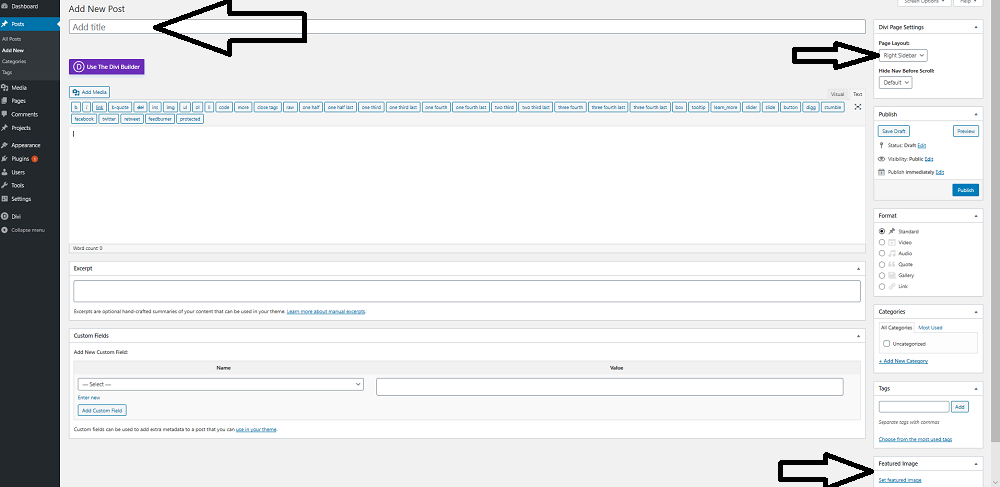
Create a title for your post then, in the ‘Divi Page Settings’ panel, change ‘Page Layout’ to fullwidth.
Add a Featured Image for your post by clicking on the ‘Set Featured Image’ link. This allows you to upload an image. The featured image will be displayed at the top of the post, once published. Make sure you resize any images before you upload them. The featured image should resized to 795 x 447px.
4: Loading the post layout
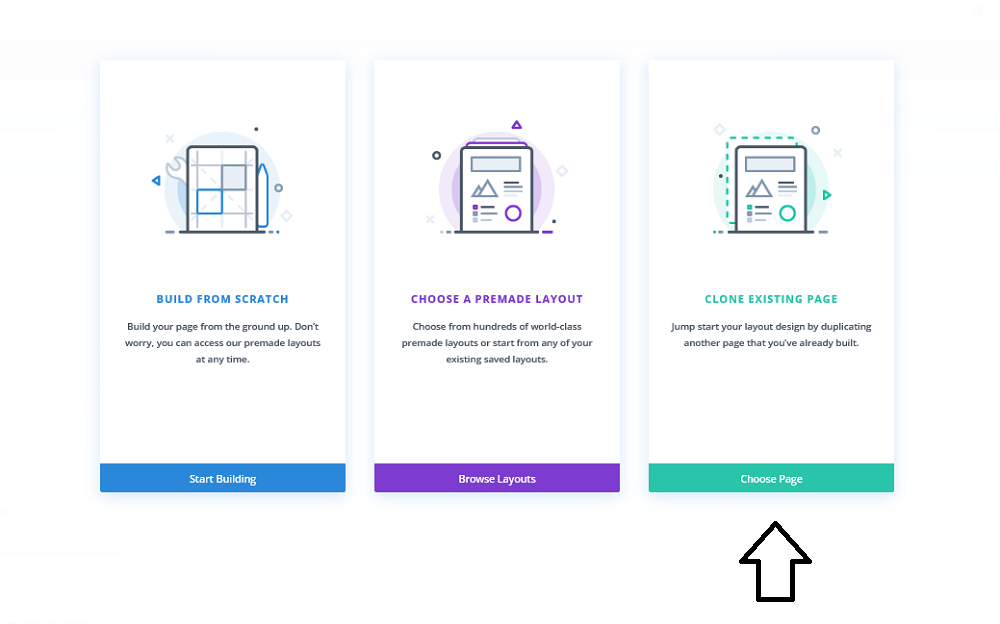
When building your website we would have created the first post for you, which you can used as a layout for all future posts. To load the layout:
Click on ‘Use Divi Builder’.
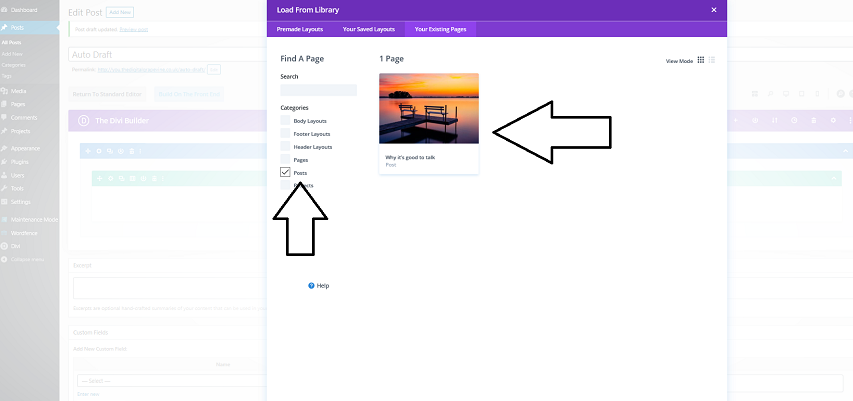
Search for the previously created post by ticking ‘Posts’ under ‘Categories’ and then click on the post.
4: Editing the post
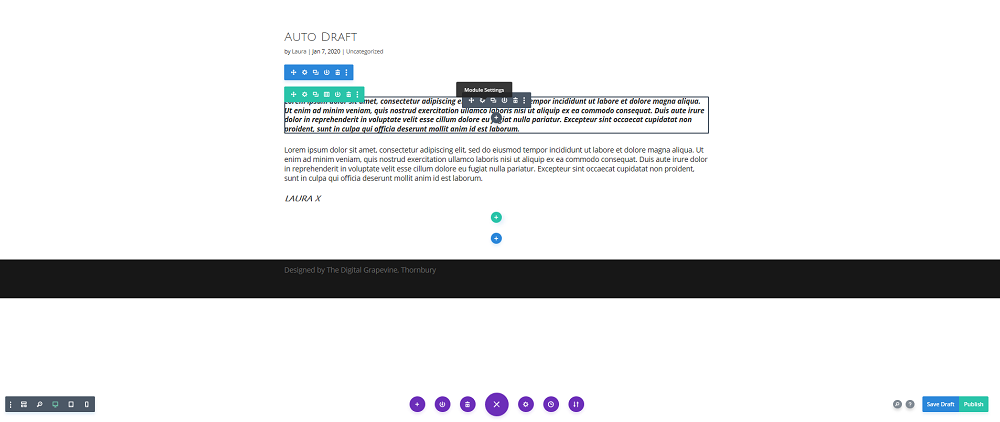
Click on the ‘Build on the front end’ button and then this will display the post in the web browser.
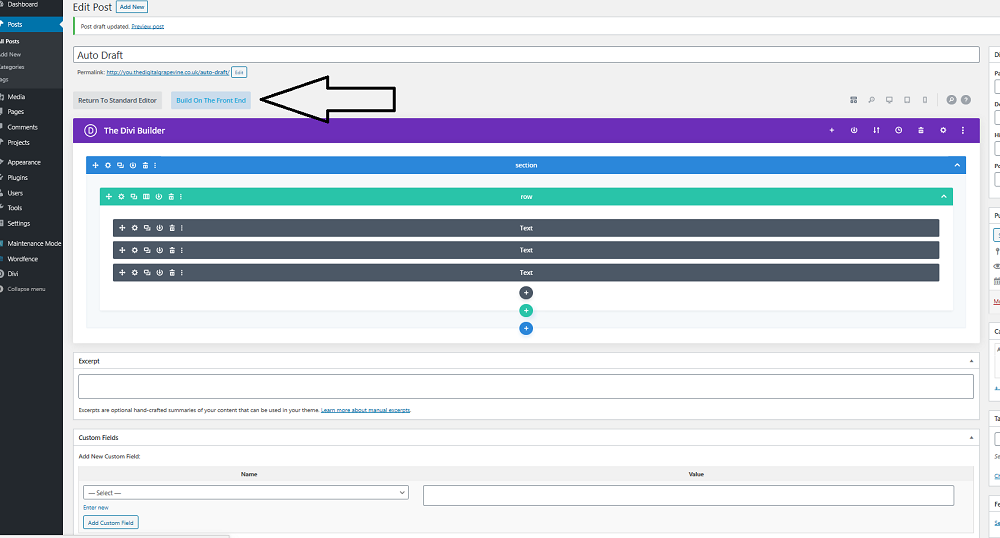
Making changes to text with the Visual Builder is as simple as clicking on the text you want to change and typing.